Apply Overrides to Wires
SureSmile automatically configures an unaltered full expression archwire based on an approved setup model. However, many times the doctor chooses to apply over corrections to the archwire to compensate for various factors such as:
- Biological considerations have not been fully taken into account by SureSmile, e.g., finestration (thinness) of bone in the maxilla above the anteriors
- The setup is not working out as expected
- Wire materials are not working as expected (or doctor is inexperienced working with a certain wire material)
- Mechanics are not taken into account
- Patient is not cooperating as expected
- Doctor wishes to override a certain aspect of the SureSmile archwire prescription based on her/his experience
- Collectively, in SureSmile these over-corrections are referred to as overrides, as they override elements of the SureSmile-generated archwire prescription.
New SureSmile doctors typically do not apply overrides to the initial SureSmile archwire prescription. It is only as the patient progresses that new doctors will apply overrides to the second and subsequent archwire prescriptions as they respond to how the patient’s treatment is actually working out.
Experienced SureSmile doctors will tend to be more proactive and will typically apply overrides to the patient’s initial wire prescription to anticipate common issues associated with the doctor’s preferred treatment approach.
Use the Wire tab in the wire design workspace to alter the design of the archwires. Entering values or selecting options on this tab alters the design of the archwire that is automatically determined by SureSmile from the base model. Collectively, these changes are referred to in SureSmile as overrides.
Slot Filling Torque
The slot filling values are automatically calculated based on the corrections applied in the setup and added to the Automatic Slot Filling cells. The torque direction Facial or Lingual is applied according to the setup movements.
Note: SureSmile’s automatic slot filling feature does not overwrite any torque numbers you type in the Torque Facial (+) Lingual (-) [deg] row in the Upper Wire or Lower Wire tabs.
Applying Curve of Spee/Reverse Curve of Spee and Expansion/Constriction
SureSmile automatically derives the correction built into the SureSmile archwire from the setup. However, you can manually apply additional over-correction as needed to achieve your treatment goals. Some SureSmile doctors routinely use over-correction to augment the movements in the setup.
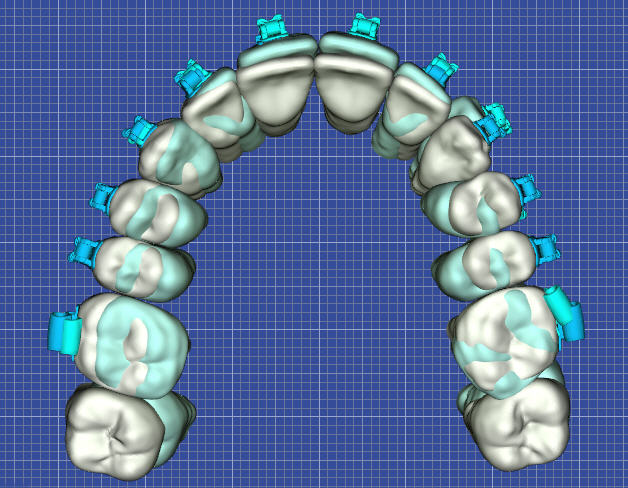
If you choose to use this approach, you can determine how much Curve of Spee/Reverse Curve of Spee or expansion/constriction to apply to the SureSmile archwire, by overlaying the active model (the plan, shown in white) over the reference model (the therapeutic model, shown in blue) in the 3D viewer. Then display the grid behind both models and use the grid to gauge how much movement has been applied in the plan. Each square on the grid represents a millimeter. The doctor can then apply his/her clinical judgment and decide if she/he wants to apply additional overcorrection.
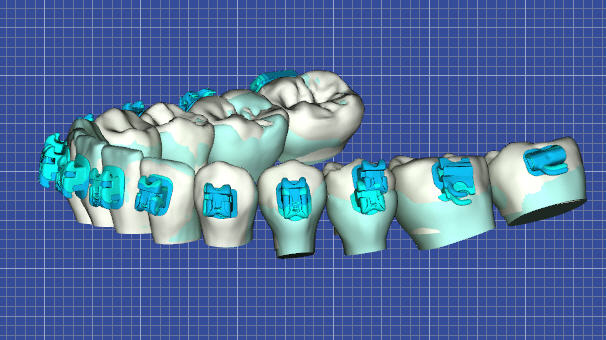
Curve of Spee is applied between the last bonded molar and the central. The apex of the curve is in the most cases the second bicuspid, where you can see the amount of applied COS as a distance to the bracket slot.
When considering additional expansion/constriction, keep in mind that expansion/constriction is applied to the entire arch. For example if you apply 2.0 mm of expansion, 1.0 mm of expansion is applied to each side of the arch.
To apply overrides to wires
- From the patient home page, click New and then select Wire.
Result: The Create New Wire dialog box opens. - If necessary, change the default values, and then click Continue. After a moment, the wire design workspace opens.
- Click the Wire tab.
- Select the arch to which you want to apply over-corrections, and then select the wire material and cross-section.
- Enter the values in the table as needed.
Result: The archwire on the model on the right side of the screen will reflect the values you entered. - (Optional) Click in the Order Name box and rename the archwire order to indicate the changes just made (e.g., Wire2 - RCOS/EXP/TORQUE].
- Click OK to save the new name.
- Click Submit to place the archwire order.