(non) Case Type Step 6 - Assign Attachments Manually
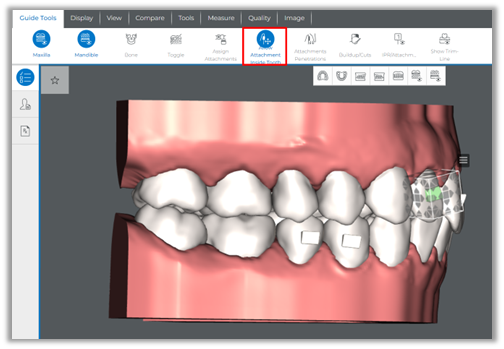
If you chose not to apply attachments automatically or want to add additional attachments, you can do this from the Attachments panel found in the Tooth Movements tab.
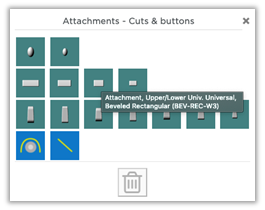
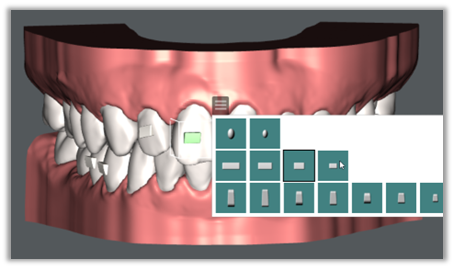
You can hover over the attachment in the panel to see the attachment description and size. In this example, you see “BEV-REC-W3” which means it is a beveled rectangular attachment with a 3 mm width.
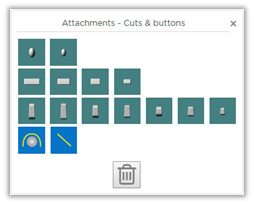
If the Attachments - Cuts & buttons panel is not shown, you can turn it on from the Guide Tools palette.

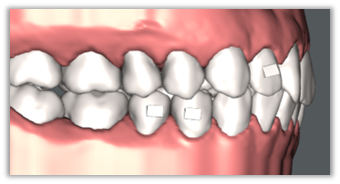
Now click on the tooth on the 3D model where you would like to place the attachment.
Tip: Click on the part of the tooth where you would like the attachment to be placed. For example, for lingual placement click on the lingual surface of the tooth.
attachments. The teeth remain in the same position as the prior stage, but the new attachments are added to the stage. Any previously placed attachments are also included.

Each template stage is designated by a ‘T’ and the number of the next stage; e.g. T2 would be placed before stage 2.
The software automatically removes the attachment(s) at the end of the sequence and places an “X” above it in the timeline.
The last stage with an “R" sign is a passive copy of the previous stage but without attachments. Because it doesn’t have movements or attachments, it can be printed for the retainer.
When you don’t have attachments, the last active stage still can be used as a retainer since it is the last stage with the last set of movements.
Attachments are colored on the 3D model to indicate the following:
 |
White means the attachment is an active attachment in the current stage. |
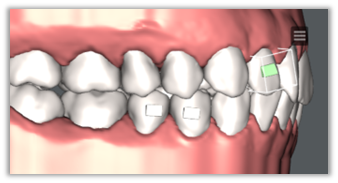 |
Green means the attachment has been click-selected and the position can be adjusted in the current stage. (To adjust an attachment: click the attachment; you will then see a box appear around it with arrows you can use to move the attachment.) |
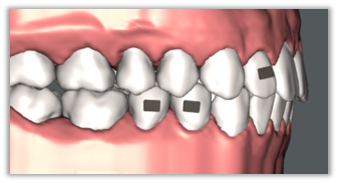 |
Black means that the attachment is on its last stage. Remove the attachment after this stage. |
This guidance is intended to prevent the interference of attachments and cutouts with the trimline and thus reduce manufacturing errors.
Guidance is calculated in real time as you place your attachments and cutouts.
This guidance helps you to maintain a suitable distance from:
- an attachment to the gingiva border
- an attachment to a slit or button
- a slit to another slit or button
- a button to another slit or button
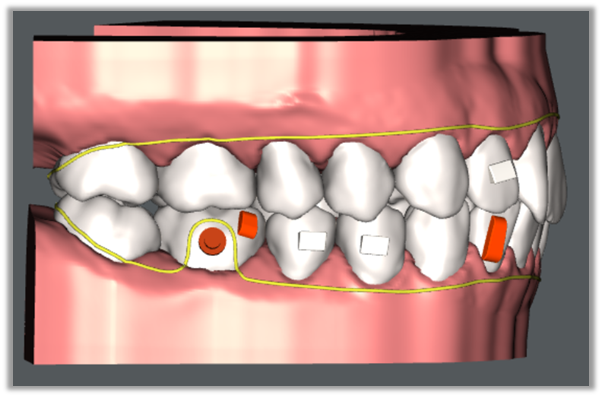
White, gray, yellow: acceptable placement
Red (shade may vary): strongly discouraged; conflicts with trimline
Important! You can still submit an order with red warnings, but failure to respond to warnings may result in manufacturing issues.
Note: Scanned attachments will only show white and black and will not show green, or red since they cannot be adjusted.
Adjusting Attachments
To adjust the attachment, select the attachment on the 3D model. The bounding box appears. Drag the handles of the bounding box to move the attachment. The attachment will maintain 3-point contact with the tooth surface.
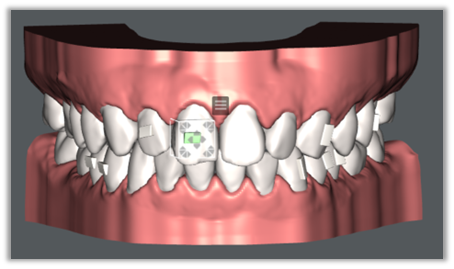
Use the menu to the top right of the attachment to make additional changes.

Click Start-End to change the start and/or end stages for the attachment.

Click Type to change the shape of attachment for that tooth.
Click Remove to remove the attachment from all stages.
Embedding Attachments
To embed the attachment into the tooth, click the Allow Attachment Inside Tooth icon in the Guide Tools palette. Then click the attachment and use the arrows on the bounding box to adjust the attachment.