Inserting Archwires
Keep the following in mind when inspecting inserted archwires:
- Wires are designed with straight (unbent) and bent wire segments
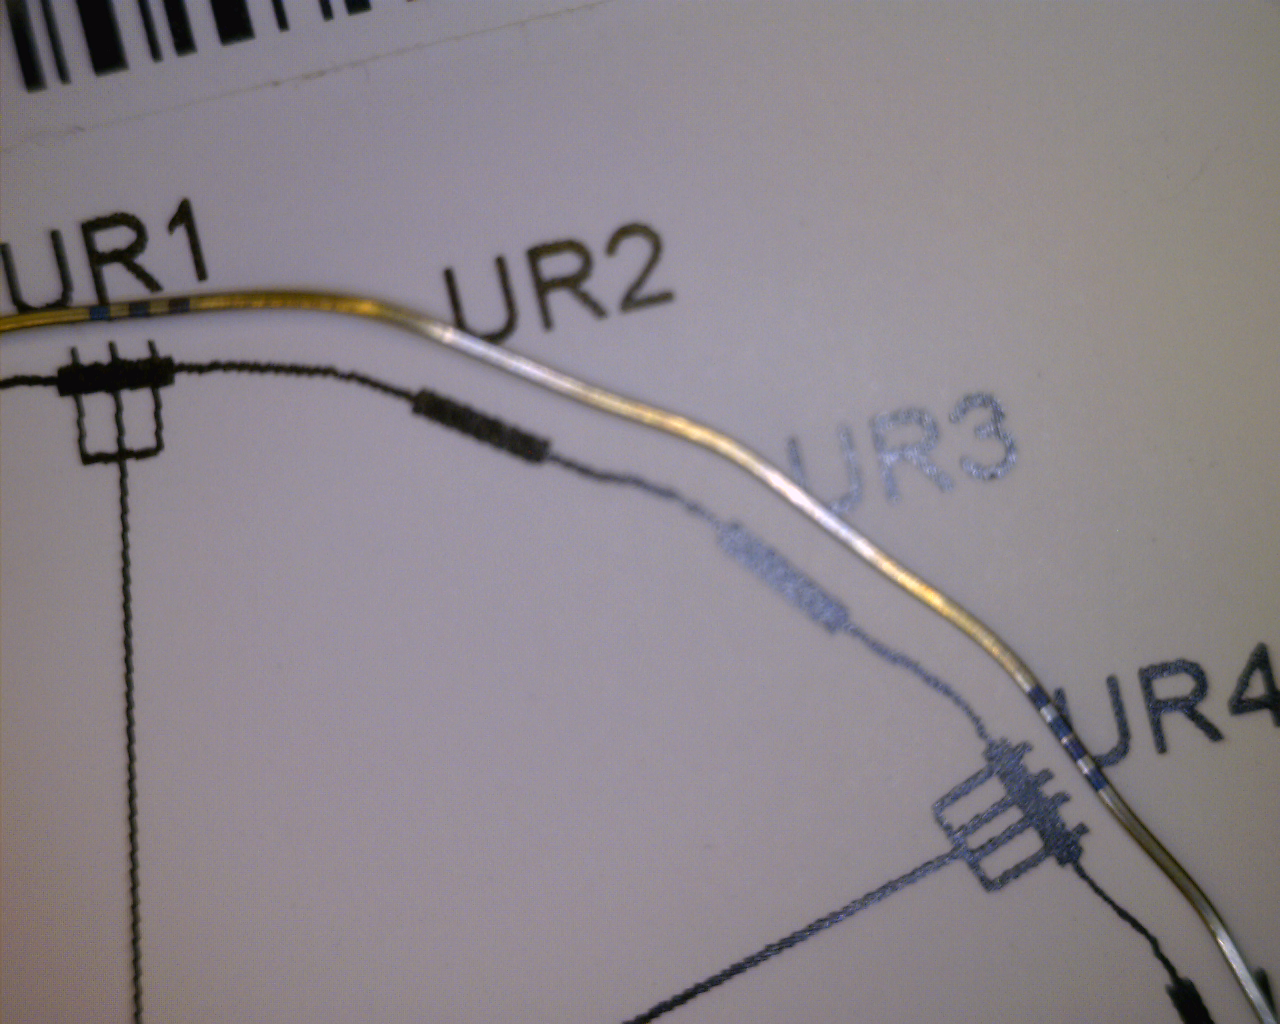
- Outer laser markings are at the ends of straight segments
- Brackets should always fit in straight segments
- Markings and straight segments reflect planned mesial/distal movements from the comparison bracket (therapeutic model) to the bonded bracket (setup)
- Make sure you engage a wire at a mark at or near the therapeutic bracket location, allowing room to move to the setup bracket location
- Upper wire markings face gingivally; lower wire markings face occlusally
Archwire Reference Diagrams
Use the following illustrations as a reference:
Show Wire Laser Markings
You can view the planned locations of the laser markings on wires directly in the model. This is helpful when inserting wires, especially with patients with substantial midline shifts. With these patients you can directly refer to the finished wires in SureSmile and use the 3D model to determine how the wires should be inserted.
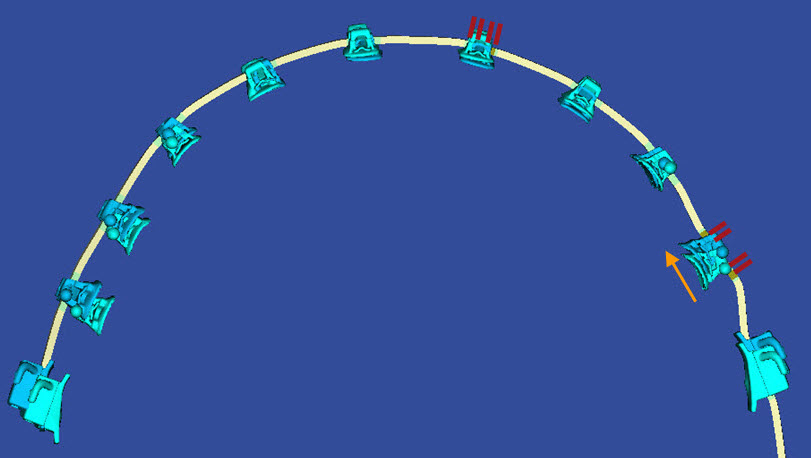
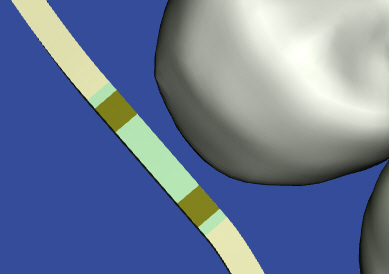
The planned position of the laser markings are depicted on the 3D model of the wire order.
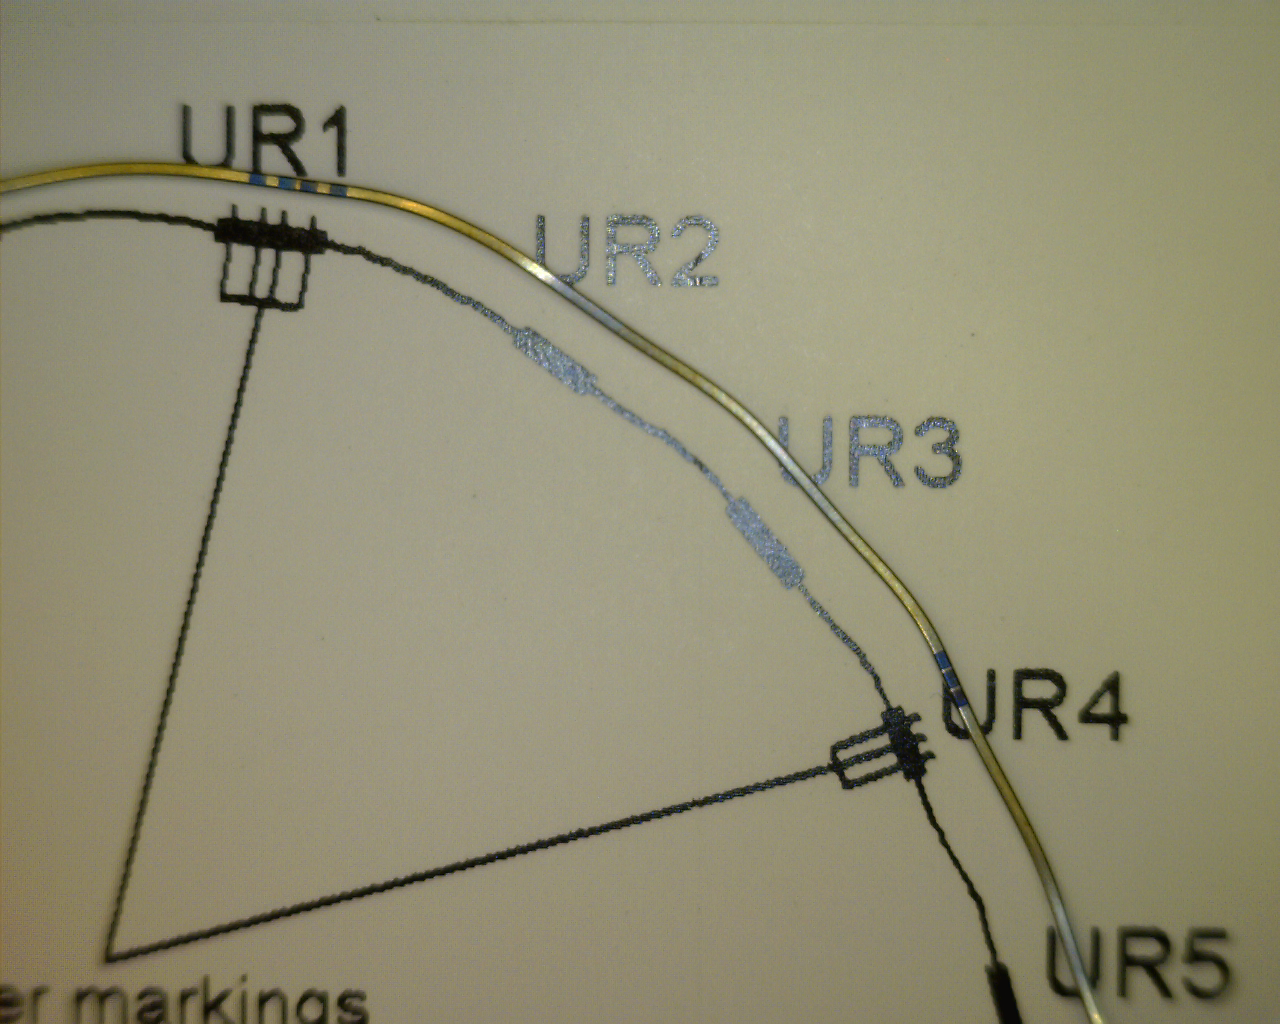
The laser marks (outer pair on uppers) on the wires correspond to ends of the straight wire segments. When you place a SureSmile wire, ensure that the brackets are inside of these marks. If your treatment plan includes space closures or a shift, consider the movement of the brackets and place the wire to accommodate that movement.
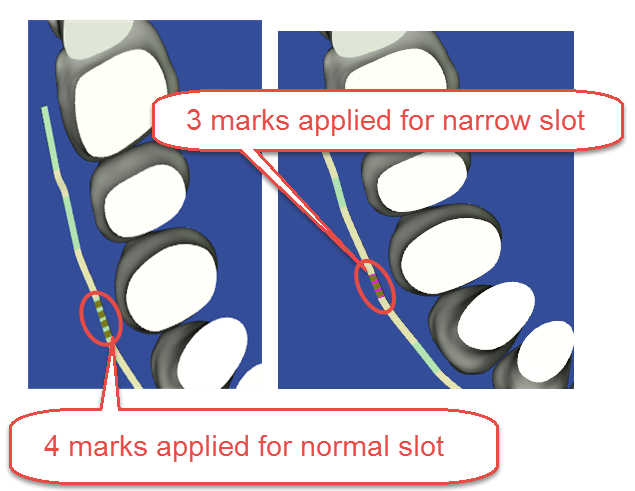
| Case "A" - Three markers used for narrow slot at UR1 | Case "B" - Three markers used for narrow slot at UR4 |
 |
 |
When should I view laser markings on the wires?
It is always useful to refer to the 3D model when inserting wires to ensure precise placement during wire insertion. This feature is especially helpful with patients with substantial midline shift, where you may not be able to match the markings to the center of the brackets.
View laser markings
Follow the steps below to view laser markings:
- Open in SureSmile the wire you are planning to insert.
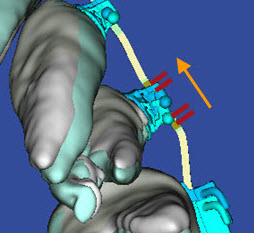
- Use the displays as guides for inserting the wire. The laser markings are visible on the wires in 3D displays as shown.
Update Wire Order after Wire Insertion
To update wire orders at the installation appointment:
- With the wire open in the wire design workspace, click the full treatment timeline icon (clock)
 to expand the timeline.
 - Find the wire you have just inserted and change status to Inserted by clicking the Wire Inserted Today icons
 on the Wire tab next to the wire material selectors .
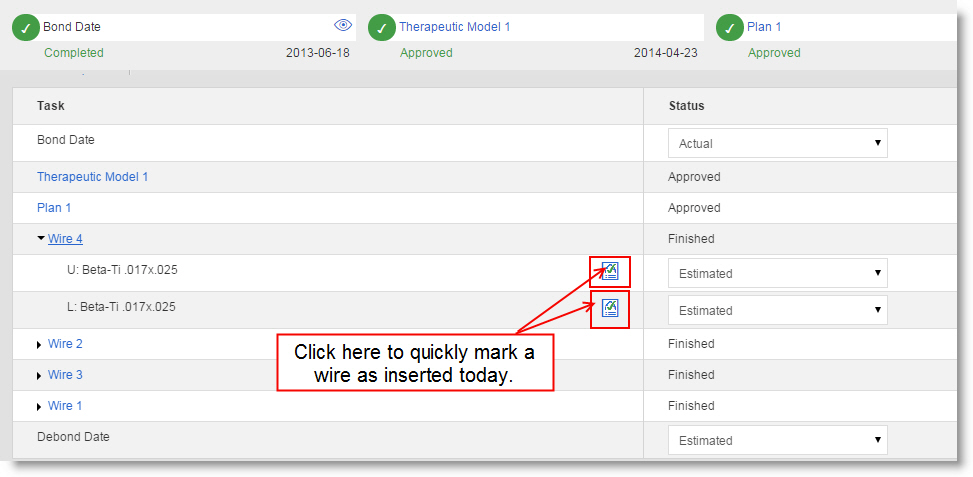
Tip: Make sure you change the status for both arches if you insert two wires.
Performing this step updates several other areas of the software:
- The wire Insertion task reminder is removed from the Patient Overview Task list.
- The patient overview timeline is updated.
- These wire orders are removed from Wire Tracking lists.