Using Attachments
Attachments allow greater control of tooth movement during aligner therapy. You can custom place attachments on the labial and/or lingual surface. You can add attachments using the automatic attachment placement constraints when creating staged models or after the staging has been calculated. You can apply attachments to all stages or just a subset of stages.
Note: Attachments are only visible on staged models. They are not shown on setups or simulations.
Automatic Attachment Placement Constraints
Place attachments using the attachment placement constraints in the Constraints dialog when creating a staged model sequence.
Choose the SureSmile 'Standard' default or create your own set under the Attachment Placement Constraints tab in Preferences.
If you do not want the attachments placed automatically, select the No Automatic Attachment Placement option in the Constraints dialog.
Attachments panel
Place attachments manually by selecting them from the Attachments panel and placing them on a single tooth.
The Attachments panel initially appears when the Displacements tab is opened in the Staged Model Sequence and can be moved anywhere on the screen. You can also display the panel by clicking the Assign Attachments icon on the Tools palette.
In the Attachments panel, attachments are displayed left-right from largest to smallest:
- Row 1: Ellipsoid attachments
- Row 2: Rectangular attachments
- Row 3: Rectangular beveled attachments
- Row 4: Aligner tray cutouts for for cuts & buttons
- Row 5: Trash can for deleting attachments
How to place attachments
Attachments allow greater control of tooth movement during aligner therapy. You can custom-place attachments on the labial and/or lingual surface.
- From the Displacements tab, select an attachment from the Attachments panel.

If the Attachments panel is not shown you can turn it on from the Tools palette.

- Now click on the tooth on the 3D model where you would like to place the attachment.
Tip: Click on the part of the tooth where you would like the attachment to be placed. For example, for lingual placement click on the lingual surface of the tooth.
Adjusting Attachments
- To position the attachment, select the attachment on the 3D model. The bounding box appears.
- Drag the handles of the bounding box to move the attachment. The attachment will always maintain 3 points of contact with the tooth surface. The system automatically generates a new aligner for the placement of attachments. The teeth remain in the same position as the previous aligner and the new attachments are added to this aligner. Any previously placed attachments are also included.
- Use the small menu next to the attachment in the 3D window to make additional changes.

- Click Start-End to change the start and/or end stages for the attachment.
- Click Type to change the shape of attachment for that tooth.
- Click Remove to remove the attachment.
Selecting Attachments
While adding or removing attachments in the Single Stage view, refer to the values on the Displacements tab to decide which attachment to use and where to place it on the tooth surface.
You can place multiple attachments on a tooth, and you can place attachments on labial and lingual surface of the same tooth.
When you select and place your attachments, take into consideration the amount and direction of movement desired. To undo a particular movement just made, click the Undo button at the bottom right of your screen.
You can apply or remove attachments to or from a tooth at different stages. You can choose which stage to place an attachment and which stage to remove an attachment.
Note: Attachments are only displayed on staged models. They are not visible on setups or simulations.
Attachment Aligners
The system automatically generates a new aligner for the placement of attachments before any aligner with newly added attachments. The teeth remain in the same position as the prior stage and the new attachments are added to the stage. Previously placed attachments still on the teeth are also included in this new aligner stage.

Tip: The patient's last aligner is a passive copy of the previous aligner without attachments. Because this aligner does not contain any movements or attachments, it can be printed and used as a retainer.
To remove an attachment:
Click the attachment on the tooth to select it and then click the trash can.
OR
Click Remove from the small menu in the 3D window.
Attachment Removal Indicators

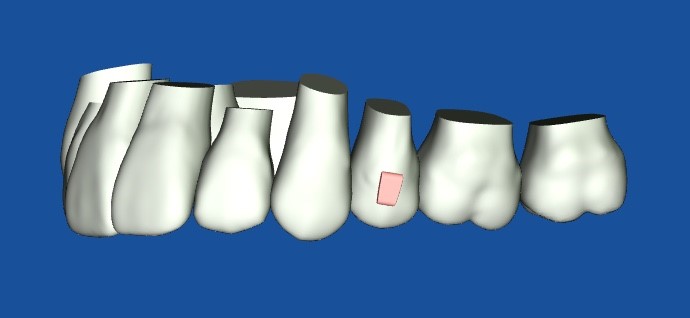
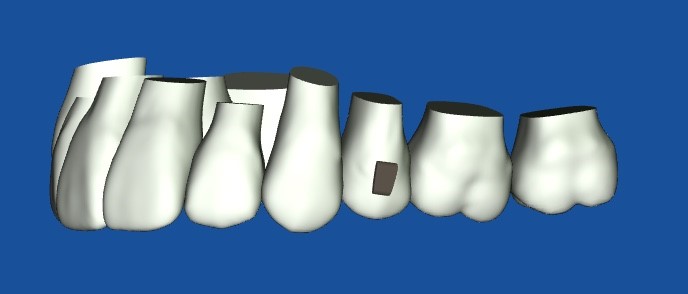
A black attachment indicates the last stage for an attachment.
A minus sign shown on the next stage tab to remind you that the attachment was removed. For instance, if prior to stage 9 (after stage 8) the attachment was removed, “–“ will display on the stage 9 tab.
Attachments are automatically removed from the last stage, and a minus sign is shown before the stage number tab to indicate that the attachment has been removed.
Attachment Colors
Attachments are colored in the 3D model to indicate the following:

White means the attachment is an active attachment.

Black means that the attachment is on its last aligner. It should be removed after this aligner.
Embedding Attachments
You can “embed” attachments into teeth as a way of modifying their size and position on the surface of the tooth to control the shape of the active surface of the tooth. For example, you can partially embed a beveled attachment to change its size and angle.
Attachments can be rotated 360 degrees on their X and Y axes. If one edge of the attachment’s base is in contact with the tooth surface, the base of the attachment can be tilted away from the surface of the tooth up to about 30 degrees. SureSmile will fill up to a maximum 3 mm gap between the attachment and the surface of the tooth. Attachments always need to maintain at least one point of contact with the surface of the tooth so they stay attached.
To embed an attachment:
- Click Aligners on the menu bar to open the Aligners palette.
- Click the Allow Attachment Inside of Tooth icon.
- Click to highlight the attachment in the 3D window.
- Using bounding box controls to embed the attachment into the tooth surface.
To reset the placement of an attachment:
- Click to unselect the Allow Attachment Inside of Tooth icon.
- Click the attachment so that the bounding box appears.
- Click and drag slightly any of the bounding box controls, and then release your mouse.
- After a moment, the attachment will reset to its original position.